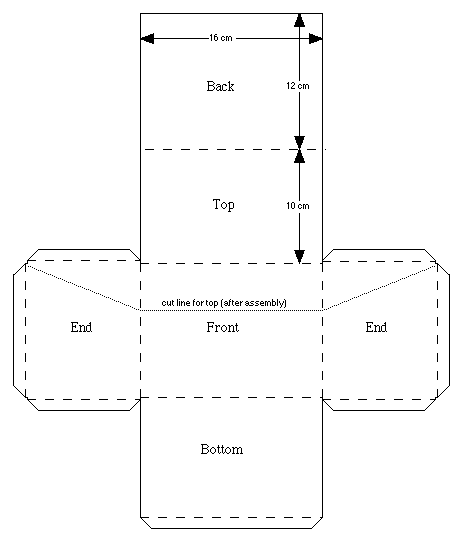
Figure C2a
Incubator Chamber
The chamber pictured above in figure C2 was made from corrugated cardboard
42 cm long and 40 cm wide. This size is about right for the other parts
and pieces which fit together to make the incubator.

Use these plans for the incubator chamber or create your own. Transfer
your incubator plans to a piece of corrugated cardboard. Use a pencil so
you can erase mistakes. Once you are confident that the incubator chamber
is drawn properly, cut it out using your sharp knife. Score the folds (by
cutting half through). The flaps, which fold over to hold it all together,
should be scored 2 or 3 mm thinner to make allowance for the width of the
cardboard. Fold the box together to be sure everything fits well. Mark outlines
where the flaps fit to help with positioning when you glue everything together.
Once you have glued the chamber together, you can cut the top so it can
open up. Draw a line 4 cm down across the front of the box. Extend this
line with slanted lines ,on the ends, from the line on the front up to the
top of the back. Cut along the line and the top should hinge open. The chamber
is done.